
Printable PDF VersionIf you’d like to purchase a printable PDF version of this tutorial which includes more size options, click here |
|
Before you begin:
- All seam allowances are 1⁄4"
- Right sides together is abbreviated as RST
- Width of fabric is abbreviated as WOF
- Fat quarter is abbreviated as FQ
- Half square triangle is abbreviated as HST
- Low volume is abbreviated as LV
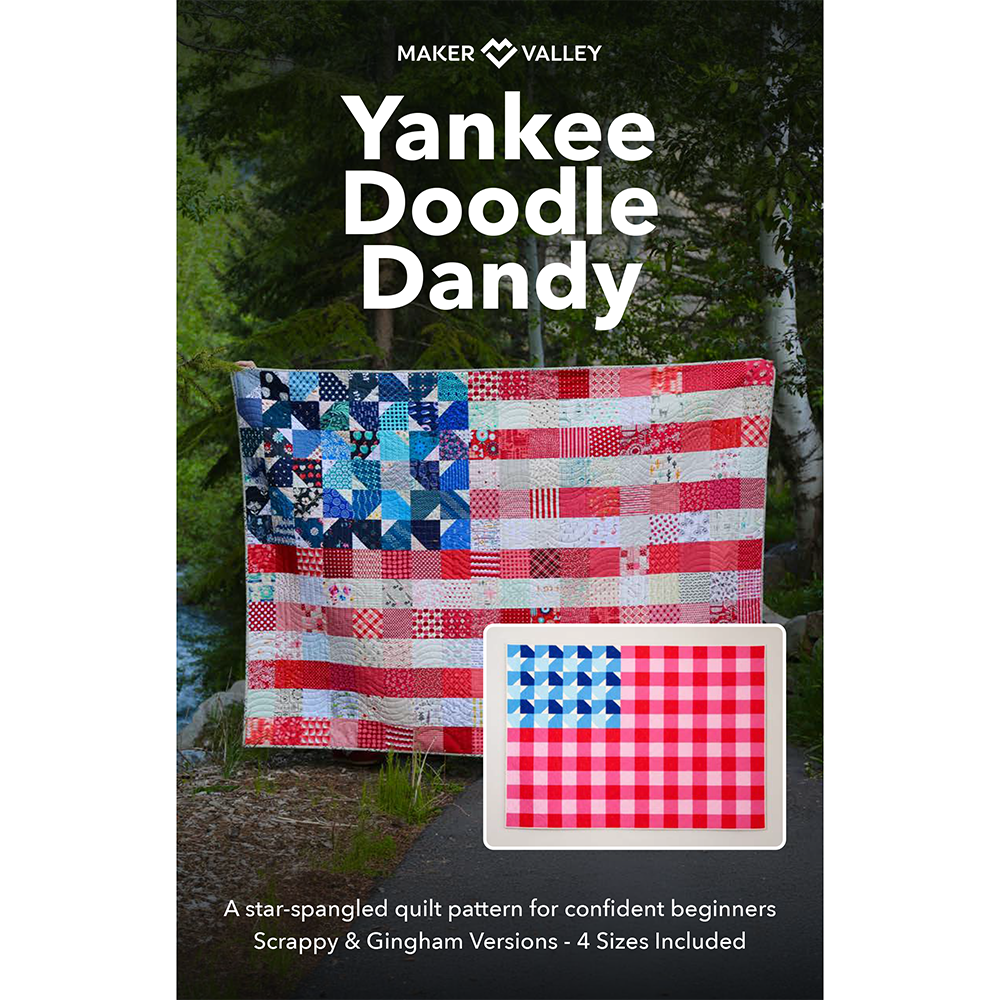
These instructions are for a throw size which measures approximately 64” x 72”. You will have 288 total squares, 16 columns and 18 rows.

For this size you will need:
- 10 red FQs or 2.5 yards worth of red scraps
- 9 pink FQs or 2.25 yards worth of pink scraps
- 5 low volume FQs or 1.25 yards worth of low volume scraps
- 1/2 yard binding fabric
- 4.5 yards backing fabric
TIP: If you want your quilt to be more scrappy, I suggest you use more of a variety of fabrics—this is a great stash-buster quilt!
Diagrams 1 & 2: A fat quarter that is cut at 18" x 21" will yield (12) 5" squares, and (16) 4.5” squares.

Cut:
(116) 5" red squares
(58) 5" pink squares
(57) 4.5" pink squares
(58) 5" low volume squares
Tip: I love low volume fabrics but sometimes they tend to be more "loud" than "low." When a "loud" low volume is paired with a lighter pink you can lose the contrast. I suggest that when pairing up your fabrics choose those that really contrast with one another so that the peppermint candy stripes really stand out in your quilt!
Make the HSTs:
Using this method of making HSTs will give you two 4.5" HSTs from each set of 5” squares.
1. Draw a line diagonally across the back of one 5" LV square and then place that 5" LV square on one 5" red square, RST.


Sew your quilt top together. You can sew each row together, but I prefer to divide the quilt up and work in quadrants.
Once your quilt top is sewn together, quilt it yourself (or have it quilted), bind it, snuggle it, love it, use it! This is such a fun and easy Christmas quilt, but is very versatile and can easily be made using other colors!
Printable PDF VersionIf you’d like to purchase a printable PDF version of this tutorial which includes more size options, click here |
|
Additionally, I have a limited number of quilt kits available in the shop (the kits include the PDF tutorial). Grab one before they're gone!
Leave a comment
This site is protected by hCaptcha and the hCaptcha Privacy Policy and Terms of Service apply.